The Fun Part
This is where building your own PC gets really fun, and sometimes really irritating. Order all the parts, and once the come in, it is time to put it all together. We will go through the order of how to put it all together, and what precautions to take when putting your computer together. The nice part about this is that it doesn't matter what type of PC you are building, all the steps are the same.
|
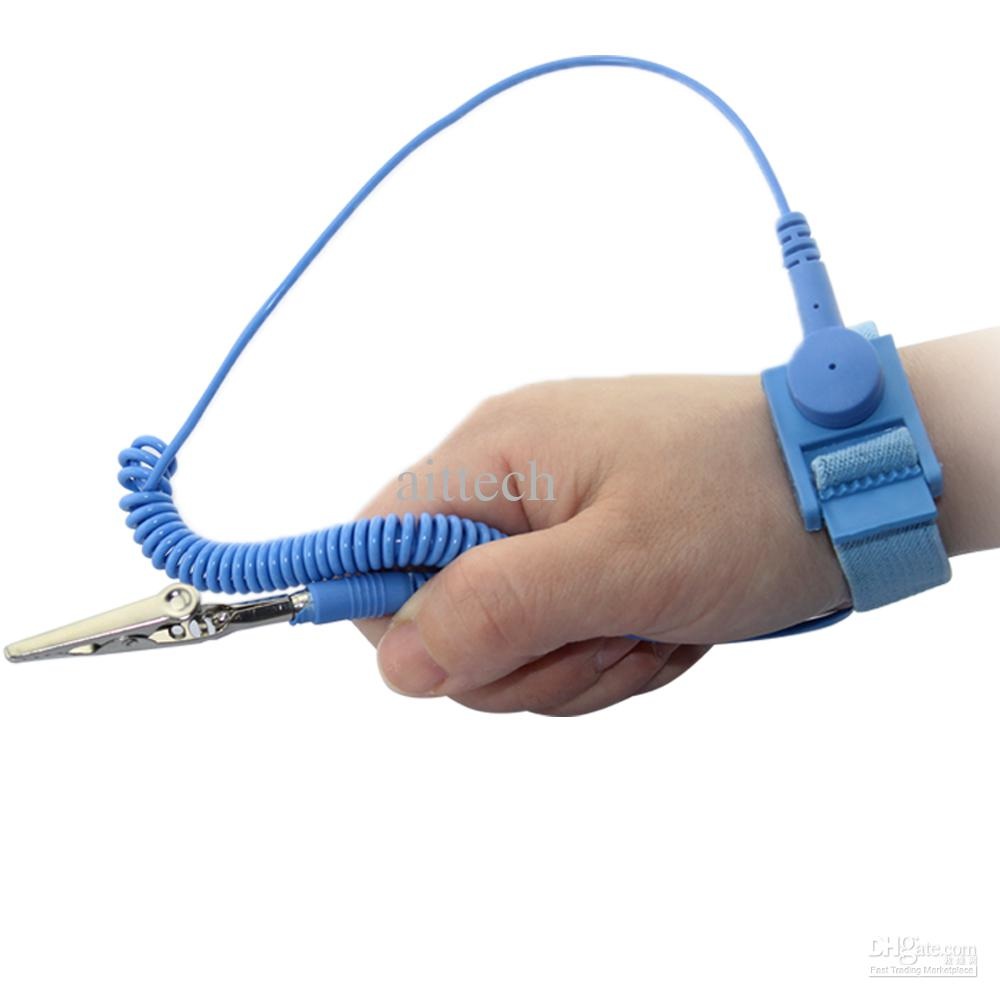
Before the Build:Before you start building, there are some things you will need to do first. Not only will you need all of your computer parts, but you will also need a working monitor, keyboard, and mouse. To build a computer, the only tool you will need is a screwdriver. it is that easy. Zip-ties or twist-ties are also helpful when it comes to cable management. The last thing you might want to get beforehand is an anti-static wristband or ankle strap. Computer parts are very sensitive to even the slightest electric abnormalities. Remember how you used to rub your socks on the floor and shock your friend. A static charge as small as that can easily fry a $200 Processor. A $5 anti-static protection device keeps you electrically grounded at all times, protecting your parts from this.
|
|
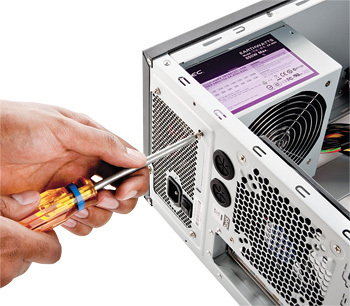
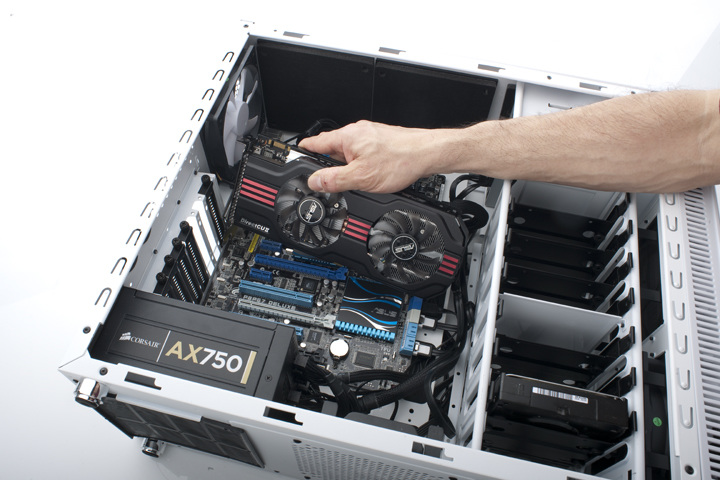
Putting in the Power Supply:Unpackage your power supply. It is highly recommended that you get a modular power supply so extra cables can be removed. Remove all cables possible and place the power supply into the bottom of the case. If there is a dust filter in the rear bottom of the case, place the PSU with the fan facing downward. if not, place it with the fan upward. Screw the power supply in from the back and make sure it is secure. Keep in mind that some cases have the power supply installation in the top, not bottom of the case. If this is your situation, just reverse all location instructions.
|
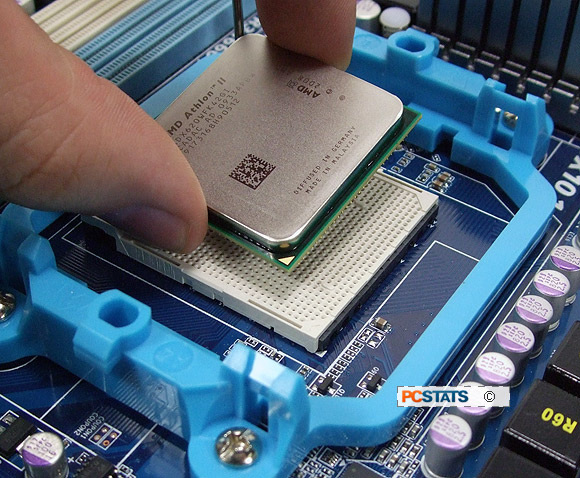
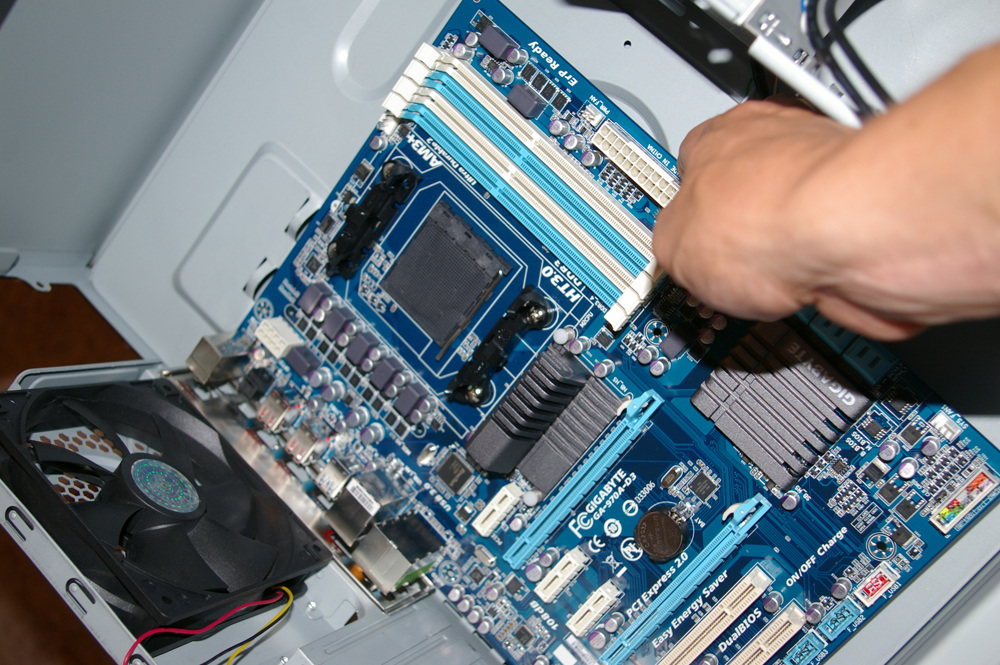
Installing the CPU.Open up your motherboard and place it on top of your motherboard box. Locate the CPU socket and carefully lift the locking arm to an open position. Make sure the socket is clean and free of debris. Next, open up your processor box. retrieve the processor and check to make sure the pins on its underside are also clean and free of debris. Be careful not to touch the pins as skin oils can reduce electrical conduction and cause problems. Locate the small arrow on the CPU and line it up with the small arrow on the processor socket. Carefully set the CPU on the socket. Do not push it, just line it up and set it down. Carefully lower the locking arm back in place, and confirm that your CPU is secured firmly. Sometimes this requires a little force to do.
|
|
|
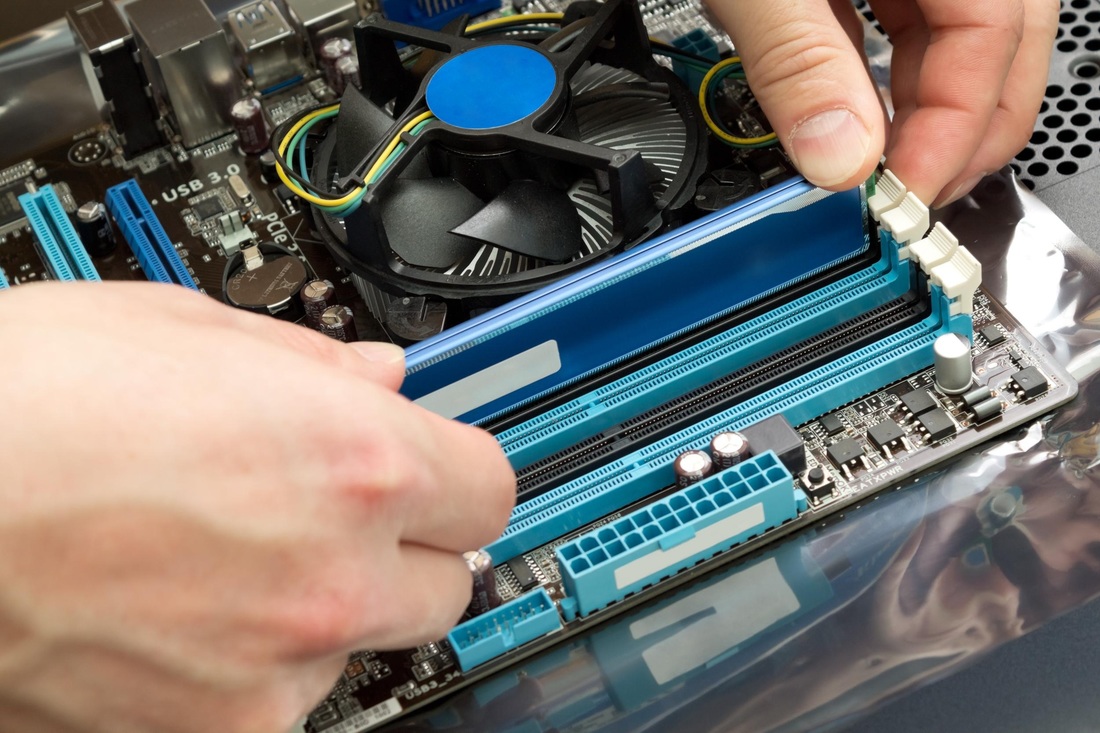
Installing RAM and CPU Cooler:Open up your RAM packaging and remove the sticks from all wrapping. With your motherboard still on its box, locate the RAM slots. Determine which lanes to use for your RAM configuration. uses them in the order they are list (1, 2, 3, 4). Open the locking arms on the edge of each RAM slot, and line up the notch in each stick of RAM with the notch in the slot. Firmly and evenly push each RAM stick into its slot until the locking arms click into place.
For your CPU Cooler, the instructions on installing it will vary. Refer to the instructions pamphlet provided with your cooler to install it. |
Putting the Motherboard in the Case:Next, open up your case. Remove both side panels and lay the case on its side with the main compartment facing upward. Locate which screw holes you will need for your motherboard and install stand-offs in each of these holes. Now place the motherboard I/O plate into the gap in the back of the case. Firmly push it in place. Now place the motherboard into the case, and carefully screw it into place. Keep in mind that screwing the motherboard in too tight can cause the board to fracture or break. Keep all screws hand tight.
|
|
|
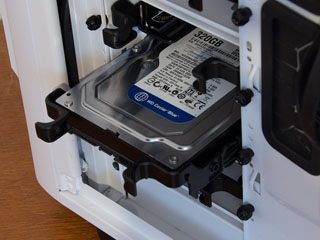
Installing Storage and Optical Drives:Unpackage all drives you have. This includes SSD's, Hard Drives, Optical Drives, or anything else that goes in a drive bay. If you case has hard drive sleds, put each storage drive in its appropriate sled and screw it in to the sled. Remember, hand tight only. Put the sled back in place now. If you do not have drive sleds, place each storage drive in its slot and screw it in. For SSD's, they are generally smaller and require an adapter to fit properly in a case. You will need a 2.5" to 3.5" drive bracket to make sure your SSD isn't moving around. Take all 5.25" drives and slide them into their correct slot through the front of the case. Once again, screw them in. Also, remember to remove and keep all drive bay covers. You don't want to lose them if you need them in the future.
|
Installing GPU's and Expansion Cards:This applies to all expansion cards, but for this example, we will use a graphics card. Unpackage your graphics card and locate the PCI-E x16 slot on your motherboard. Remove the corresponding expansion slot covers that will be used by your graphics card. Now, similar to the RAM, open the locking arm at the end of the PCI-E slot. Firmly and evenly push the graphics card into the slot after lining up the gap in the electrical contacts. Once the card is in place, screw the card into the expansion slot bay where the covers where installed.
|
|
Cable Management:Lastly, you will want your case to look clean and tidy. By this point in time you will have tons of power cables, data cables, front end headers, and more. There are many guides to cable management and some people spend hours on this alone. Remember, better cable management means better cooling, and generally better looks. Here is a great video guide put together by they guys over at Awesome Sauce Network to help you in this process. These guys do a great job explaining how to cable manage, and are much more detailed than we can be here.
|
|
